Costco Gazebo Guide: Models, Features, Assembly, Care, and Policies
Looking at a gazebo to expand outdoor living space can raise practical questions about models, materials, setup, and what happens if something goes wrong. This guide explains how Costco’s gazebo offerings typically work, which features matter most, how to plan and assemble safely, and what to know about maintenance and policies.

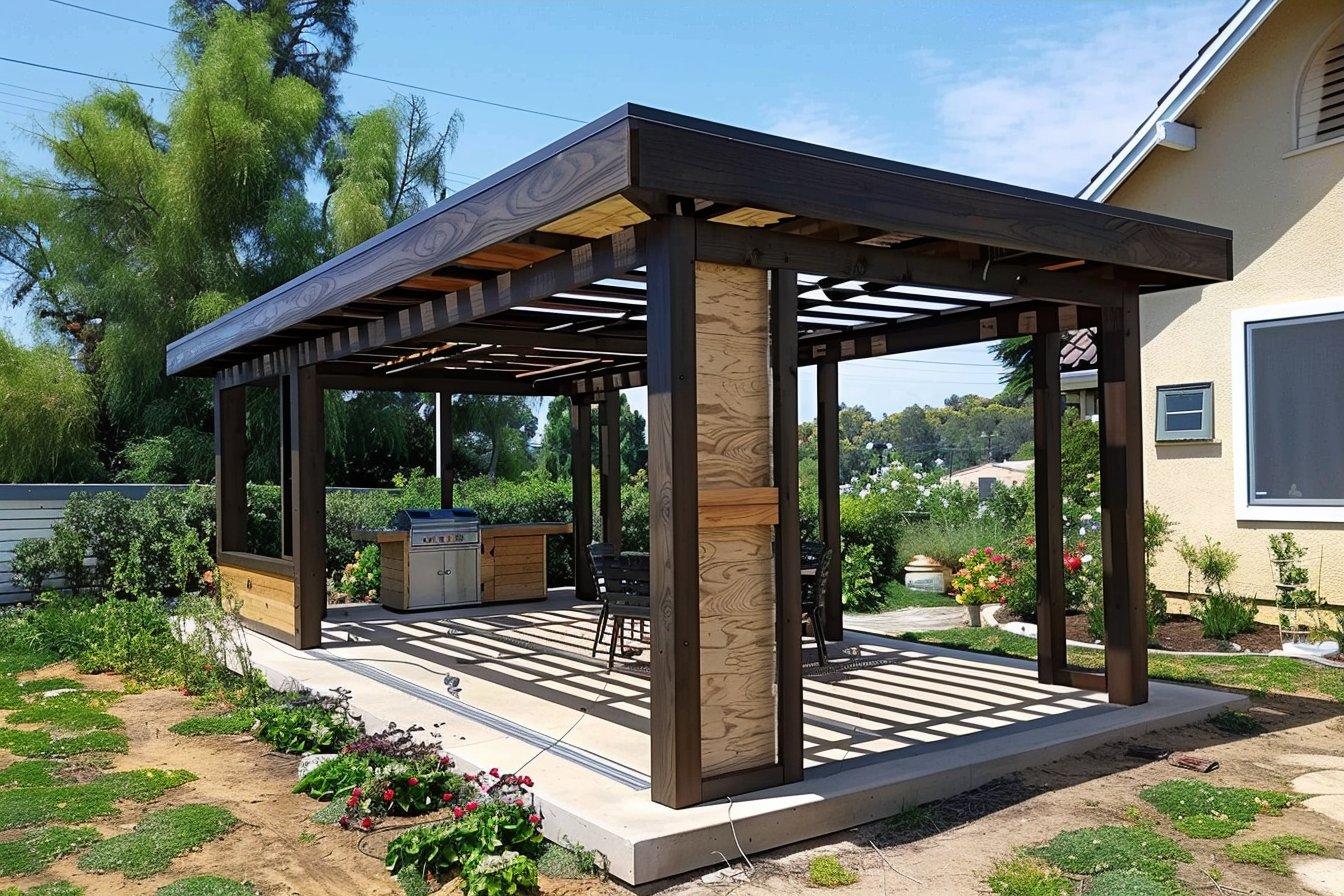
Costco offers a rotating selection of pre‑engineered gazebos and pavilions designed for backyard shade, dining, and weather protection. Because inventory changes seasonally and by region, shoppers will often find a mix of wood and metal frames, hardtop roofs, privacy add‑ons, and bundled accessories like mosquito netting. Understanding model differences, installation needs, and policies helps you choose confidently and avoid issues after delivery.
Overview of Costco gazebo options
Costco’s assortment typically includes freestanding hardtop gazebos, pavilions, and sometimes pergola‑style structures. Sizes commonly range from compact 10×10 feet to larger footprints such as 10×12, 12×12, 12×14, 12×16, and 12×20. Listings may show open‑air pavilions for dining areas, more enclosed gazebos for seating, and pergola hybrids with partial shade. Products are generally sold as complete kits with pre‑cut components, hardware, and illustrated instructions. Online orders often ship via freight delivery, while warehouse availability varies. Some listings may note optional installation in select areas; details differ by location and vendor.
Key features and construction materials
Frames are commonly cedar or other treated lumber, aluminum, or powder‑coated steel. Wood offers a warm aesthetic and natural rigidity; it typically requires periodic sealing. Aluminum is lightweight, corrosion‑resistant, and low‑maintenance. Steel provides strength and weight, with powder coating for rust protection. Roof systems vary: galvanized‑steel panels for durability and snow resistance, polycarbonate panels for light transmission and UV filtering, or aluminum/composite assemblies. Many models include vented canopies to improve airflow, integrated gutters for drainage, and concealed fasteners for a clean look. Accessories can include mosquito netting, privacy curtains, LED lighting tracks, and shelves. When comparing, review stated wind and snow load ratings, anchoring requirements, and whether screens or curtains are included or sold separately.
Choosing the right size, location, and permits
Start with use case and traffic flow: dining table clearance, grill ventilation, or lounge seating. Measure the slab, deck, or ground pad and allow extra space for overhangs, gutters, and door swings. Consider sun angles, prevailing winds, and proximity to entries, landscaping, and utilities. Confirm the base can accept anchors appropriate to the structure (concrete expansion anchors, structural screws into framing, or ground anchors for footings). Local rules matter: some municipalities require permits for structures above certain sizes or when anchoring to decks. Homeowner associations may also have height, setback, or color guidelines. Always verify rules in your area and call utility‑marking services before digging footings.
Assembly tips, tools, and common pitfalls
Plan for two to four people and a full day or weekend, depending on size and experience. Clear the site and stage parts on a soft surface to avoid scratches. Read the manual end‑to‑end before step one; identify sub‑assemblies and hardware bags. Helpful tools include: tape measure, level, rubber mallet, ratchet set with metric/SAE sockets, adjustable wrench, ladder(s), and a drill/driver with a clutch set low to avoid over‑torque. Square and plumb each stage before tightening; lightly snug bolts until the frame is aligned, then final‑tighten in a cross pattern. Anchor as specified—skipping anchors is a major cause of damage in wind. Common pitfalls include assembling the roof in the wrong orientation, mixing fasteners of similar length, overtightening self‑tapping screws, misaligning posts on uneven pads, and attempting installation in high wind. If your model specifies sealant for roof panels or flashing, apply neatly and allow cure time before heavy rain.
Maintenance, warranty details, and return policy
Routine care prolongs performance. For wood frames, inspect annually for finish wear, splitting, or loose fasteners; clean and re‑seal or stain as recommended by the manufacturer. For aluminum and steel, wash with mild soap, rinse, and touch up any chips to protect against corrosion. Keep gutters and roof seams clear of debris. In snowy climates, observe the stated snow‑load rating and remove excess accumulation with a soft roof rake. Check anchors and hardware seasonally, especially after storms. Warranty terms vary by brand and model; many offer limited coverage on structure and roof components for a defined period, with separate terms for accessories and finish. Keep purchase documentation and serial numbers for any claims. Costco’s general satisfaction policy is well known, but procedures for bulky freight items can differ by region; contact customer service for guidance on returns or replacements of assembled or large outdoor structures. Policies outside the United States may vary, so review your local Costco website for specifics.
Brands and models you may see at Costco
Costco’s lineup changes, but it may include offerings from established gazebo manufacturers. The examples below illustrate common categories and differentiators you’ll encounter when comparing models.
| Provider Name | Services Offered | Key Features/Benefits |
|---|---|---|
| Yardistry | Prefabricated wood gazebo and pavilion kits | Cedar frames, pre‑finished components, integrated gutters, detailed instructions |
| Sunjoy | Metal and mixed‑material gazebo kits | Aluminum/steel frames, polycarbonate or metal roofs, screen and curtain options |
| Paragon Outdoor | Aluminum hardtop gazebos and pavilions | Corrosion‑resistant frames, vented hardtops, modern profiles |
| Sojag | Steel/aluminum gazebos and solariums | Powder‑coated frames, galvanized‑steel roofs, seasonal enclosure options |
| Backyard Discovery | Wood gazebos, pergolas, and pavilions | Pre‑drilled lumber, hardware packs, optional screen kits |
Practical delivery and site notes
Freight shipments are typically curbside; inspect cartons at delivery and photograph any visible damage before signing. Move boxes to a flat, dry staging area and verify all parts against the manual before starting. If the site is unlevel, plan for shims or a properly poured pad. When installing on decks, ensure the deck framing can handle the additional load and use appropriate structural fasteners into joists or blocking, not just surface boards.
Safety and weather awareness
Follow ladder and tool safety, wear eye protection, and pause work in strong winds. Temporary bracing during assembly helps keep frames square. If local conditions include high winds or heavy snow, prioritize models with published ratings that meet or exceed expected loads and follow anchoring instructions precisely. Store soft accessories like curtains during storms to prevent tearing and hardware strain.
Policy and documentation checklist
Before purchasing, save the product page as a PDF for specifications, ratings, and warranty terms. Keep delivery receipts and take photos of the assembled structure, anchors, and serial labels. Register the product with the manufacturer if offered. For any service, contact the manufacturer for parts support and Costco customer service for order or return questions, noting your region’s specific procedures for large items.
In summary, selecting a gazebo through Costco involves matching size and materials to your space, confirming local requirements, planning a precise assembly, and maintaining the structure seasonally. With careful comparison of features and a clear understanding of warranty and return procedures, a well‑installed gazebo can provide durable shade and year‑round utility.


